SIMSI releases the joint
technical protocol about the operation of professional scuba diving activity in compliance with the COVID-19 infection reduction measures. The documentation has been already forwarded to the Italian Government: click here or on the picture below to read the full article (Italian language only).
A platform to explain and share, with simple language, solid awareness towards "scuba diving good practices" to be implemented by divers but also by dive professionals in their day-to-day activity.
Tuesday, 28 April 2020
Sunday, 26 April 2020
A FEW (RELAXED) CONSIDERATIONS ABOUT FINS
Speaking
about fins my first consideration is... before thinking about which
fins style and shape better adapts to you, train on the development
of proper kick techniques, learn how to maximize (but also control)
propulsion while minimizing physical exertion and consequently air
consuption, focus on trim and buoyancy. At this point, the shape of
your fins will be just a secondary problem.
During
our Open Water course we realized that there are basically
two macro tipologies of scuba fins (here I am not even talking about
light open heel fins to be used barefoot as I consider them
snorkeling fins not suitable for scuba activity):
- foot pocket fins;
- open heel fins with strap, to be used with neoprene boots.
The
first category can be worn also bare foot and may seem a good solution
for hot tropical environments, also because they are generally
lighter and easy to pack in the luggage. All of us did use them at
least once in our life, in the swimming pool or by doing snorkeling.
Nevertheless,
if you are seriously into scuba diving I suggest to leave this kind
of fins to snorkelers and always go for open heel fins and neoprene
boots. You will soon recognize the advantages of this solution:
- the rubber sole of the boots offer extra stiffness to your kick, transmitting the energy in a more direct way to the blade, thus maximizing the propulsion;
- boots seat better in the foot pocket, tightly secured by the strap, and you do not risk to lose the fins as it may happen with lighter foot pocket fins when you kick too hard;
- boots protect your feet from excoriation caused by the contact of your bare foot with the rubber foot pocket;
- neoprene boots can be used as normal shoes and offer protection while walking on the boat or on the shore;
- boots guarantee extra thermal isolation.
One
word about the strap: open heel fins are distributed with a large
variety of straps. By choosing your fins, you are also choosing your
strap: make sure that the strap is of the right size of your foot,
opt for one piece rubber bands or better iron springs, avoid
adjustable or expanding plastic clip buckles that are often fragile
and soon or late will break as well as bungee cords that are more
likely to wear out by the use in salt water.
Finally
speaking about fin design, in the mega expanded universe of market
offer it is possible to identify main 5 categories, based on the
blade shape.
Paddle
fins: generally optimized for flutter kick, they represent the
simplest design and basically display a blade directly attached to
the foot pocket. Most models are mono or bi-material (plastic +
rubber). Paddle fins often have different inclinations between foot
and blade for optimized kicking angle. Many bi-material blades are
designed with two or more channels that funnel the water flow along
the whole blade length, improving propulsion.
Jet fins:
technical fins by definition, optimized for frog kick technique. With the exeption of very few models they are prevalently made out a
single rubber mold (thus very heavy) and display vents on the blades
that have the purpose of minimizing the mechanic resistance of the
water in the kick loading phase.
Split
fins: thought and designed to make flutter kick less exhausting,
split fins offer the same propulsion of paddle fins but with less
strain. Basically the split, when you kick, creates an open angle in
the blade that causes a pressure disbalance which “sucks” the
water along the whole blade length, minimizing the effort but keeping
the propulsion constant. Basically useless if used with frog kick
technique.
Hinge
fins: Recent design concept, the blade is connected to the foot
pocket by a hinge. Developed in aquadynamic flume, this fin has been
thought to reduce stress and strain in the foot ankle while
mantaining good propulsion. In my – personal – opinion this is
more a marketing claim rather than real and concrete measurable
advantage.
Force
fins: niche product, designed to imitate the tail of marine
animals, used with flutter kick they offer a very good propulsion.
Very good fins for walking on the boat. Not performing with frog kick
and ridiculously expensive.
![]() |
📸 Stefano Festini
|
Now
that we learned something about the market offer, it is time to
choose the right fins. Here some food for thought:
- choose the fins according to your personal kicking technique: if you practice only flutter kick, jetfins will not be performing and as anticipated, split fins will be almost useless if you try to do an helicopter turn;
- consider the kind of exposure suit you will use: many drysuit divers prefer to use very heavy jetfins in order to balance the slightly positive buoyancy of their legs given by the drysuit. On the contrary, using heavy jetfins with a 2 mm shorty could lead to feet down or dropped knees trim;
- this leads to the next suggestion: always consider the weight of your fins and its impact on your buoyancy. You may find very similar fins models and shapes distributed by different brands with very different weights;
- remember that wearing the wrong fins causes more strain and possibly cramps, so it is worth to invest some time and trial dives to find the right fins.
Conclusions:
- always choose a combination of open heel fins + neoprene boots;
- learn different kick techniques and try different kinds of fins;
- fins play an essential role on your trim. Study your position and your weight; distribution, choose a fin that helps you mantaining an horizontal position.
If
you still do not have clear ideas, I suggest to opt for the simplest
bimaterial paddle style channel fin with high and stiff sidebars that
you can find. This solution offers a good compromise between
propulsion and comfort and allows very good control also in case of
frog / back kick and helicopter turn.
One
last word about freediving fins: although some scuba divers use them, I
suggest to avoid long blade freediving fins. They are
specialty fins, and their long flexible blade offers high propulsion
and minimizes physical exertion only in combination with the proper
kicking technique. Moreover in our OW course we learned that in the
water we want to move as less as possible so manoeuvrability, and not
propulsion, must be our primary focus. In fact, using freediving fins
in bigger groups may result clumsy and their long blades could lift
lots of sediments. Eventually, long blades use a lot of space on the
boat and are most likely to damage by giant stride entry.
And
you? Which fins do you use, and why?
Saturday, 25 April 2020
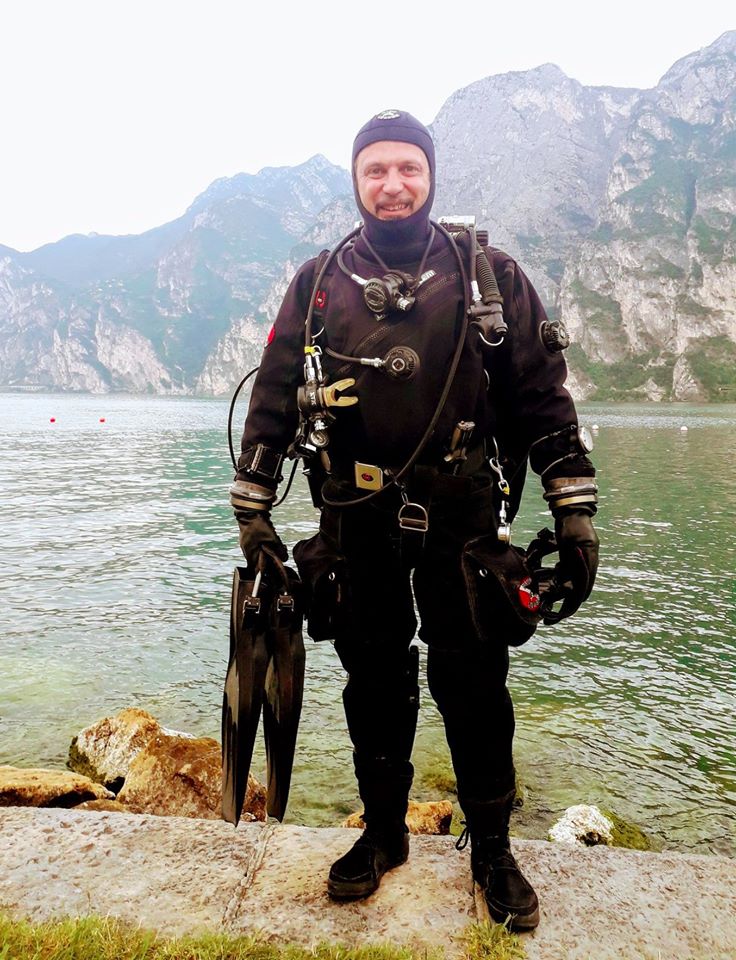
DRYSUIT AS BUOYANCY COMPENSATOR?
When I am home and dive at Lake of Garda, in Northern Italy, I am used to temperatures between 22-14°C in summer and 12-6°C in winter, so one of my first specialty training has been, of course, Drysuit Diving.
Over time I have been drysuit diving with many buddies and some of them use the drysuit as a primary buoyancy compensator, giving the BCD or wing a role of mere redundancy and using it only as a floating device for positive buoyancy on the surface. This way, they have to manage only one single volume of air during the dive, still having the BCD as a redundancy and safety option.
SSI at least, discourage this practice, opting for jacket or wing as a primary buoyancy compensator and recommending to transfer to the drysuits only the minimum quantity of air necessary to detach it from the body preventing squeezes.
I personally fully agree with this orientation, in the light of following:
- less air volume in the dry suit impacting on buoyancy and trim position. In fact, a greater volume of air in the drysuit can move from the waist area to the legs, creating problematic situations that can be solved only through specific techniques;
- the extra air pressure in the dry suit, in connection to ungraceful body movement, could lead to air loss through cuffs and / or collar, increasing the risk of flood;
- given its great surface, the dry suite is more likely vulnerable to lacerations and punctures;
- bcd are easier to control and do not require extra body movement to deflate.
Even though the majority of newest training standards seem to follow the same direction, I keep hearing of divers using the drysuit as as BCD, so I am happy to read your opinion! What does your training agency recommend?
Thursday, 23 April 2020
DAN & A.DI.SUB RELEASE 10 RECCOMENDATIONS ON COVID-19 RISK MITIGATION FOR SCUBA OPERATORS
Waiting for the reopening of SCUBA Diving activities in Italy, DAN in cooperation with A.Di.Sub, releases a document with 10 reccomentation on the correct risk mitigation protocols for SCUBA Diving Operators: click here or on the image below to read and download the full documentation (in Italian).
Wednesday, 22 April 2020
ATTIVITĂ€ SUBACQUEE: PROTOCOLLO TECNICO PER I COMPORTAMENTI CORRETTI
Finally in Italy something is moving in the direction of setting new guidelines for the prosecution of SCUBA activities in the phase 2 of COVID-19 emergency.
SIMSI, ASSOSUB, AISI and Diritto & Subacquea are working on a joint technical protocol about correct behaviours during the Phase 2 of the pandemic: click here to read the article.
Let us wait until the 27th of April before any further consideration.
Tuesday, 21 April 2020
SURFACE AIR CONSUMPTION (SAC)
Many entry level, but also more experienced divers, are unfamiliar with SAC: many times, when speaking to students and divers about this topic, they look back at me with the eyes wide open!
Not all teaching systems include SAC calculation in entry level courses material. Anyway in my opinion is essential that divers get acquainted to its calculation in order to be independent and be in the condition of planning their dives and knowing their personal limits, for their own safety.
Even when dive planning plays a secondary importance, like for example in the case of diving tourism, knowing your own SAC can simplify the activity of your divemasters and facilitate the choice of the right cylinder size, making the dive more comfortable out and in the water.
Let us have a look at the SAC formula and at the data necessary for its calculation [metric system].
Air Consumpton (AC).
This is our total air consumption during the dive, indicated in bar. This data can be calculated by subtracting from the initial pressure of the full cylinder the pressure left when we exit the water (e.g. 200 bar - 50 bar = 150 bar).
Volume of the cylinder (V).
Easy to understand, this is the volume of the cylinder in use, expressed in liters (e.g. 10l, 15l…).
Time (t).
Total time of the dive, in minutes.
Absolute pressure at depth (P).
This is the absolute pressure, indicated in bar, corresponding to the average depth of the dive. To obtain this value we simply need recall from your dive computer the average depth of the dive in meters and convert it in bar. Make sure that the value indicates the absolute pressure!
These data can be put toghether in the following formula to calculate the SAC:
SAC = AC x V / ( t x P)
Now a concrete example, assuming that we have been 50 minutes underwater, at an average depth of 12 meters (corresponding to 2,2 bar absolute pressure), and we used a total of 150 bar from a 12 liters cylinder:
150 bar x 12l / (50min x 2,2 bar) = 16,36 l/m
Now that we have our SAC we can easily plan our next dive (depth, duration and gas supply needed) or check if it will be within our personal limits!
It is important that we record our SAC in our logbooks on a larger number of dives, so that we dispose of a significant average value. In fact, SAC rate may vary by many factors such as water temperature, level of fitness, ambient conditions, buoyancy and trim, underwater activity and air leaks.
Moreover, by monitoring the SAC you will be able to track any improvement of your gas consumption over time and experience!
Sunday, 19 April 2020
BUDDY CHECK
Before entering the water all of us diving professionals always remember to our divers to perform a complete buddy check with their buddies.
But are we looking at them during their check? Do we pay attention and correct them if we notice something wrong?
In my day to day activity I see a lot of experienced divers directly skipping this step, or carrying it on very superficially, just inflating the BCD and taking some deep breathes from the regulator. Moreover, all the attention of the divers is usually directed to their own equipment, they only give a brief look at their buddies configuration.
When performing it, divers must keep in mind that the buddy check is the moment where they have the chance of knowing and getting familiar with their buddy’s equipment: this step is very important especially when divers are on holiday and they get assigned potentially to a new buddy every day.
But why is this step so important? If we think about the role of the buddy, we all agree that he’s the person that will help us in the water in case of necessity (this works of course both directions). He must be in the condition of using and operating with our equipment, by example by arranging our BCD, removing / adding weights to our pockets, fastening the cylinder, and so on...
Thus, the buddy check has two specific purposes: making sure that we are ready to dive safely, but also making sure that we know exactly where to locate and how to operate our buddy’s gear.
We all remember the magic formula for the buddy check “BWRAF", so go through it together again:
B - BCD
- Is the low pressure hose attached and functioning properly?
- Check if the BCD has any air loss.
- Check and operate all the damp valves.
W - WEIGHTS
- Did we wear the appropriate amount of weights?
- Where are the weights located?
- Is our buddy familiar with how to release our weights, in case of necessity?
R - RELEASES
- Are all the releases closed properly and easy to locate?
- Is our buddy familiar with the releases of our BCD? Is he able to open them indipendently in case of necessity?
- Divers often forget the most important release(s): is the cylinder properly secured on our back?
A - AIR
- Is the cylinder open?
- Enough pressure to dive?
- No leaking between cylinder and 1st stage?
- Take a couple of deep and long breathes from the regulator, by looking at the manometer. If the needle is not moving from 200 bar, the cylinder is open.
- Check also the alternative air source same way as above, make sure that your buddy is familiar with its position and operation.
F - FINAL OK
- General final check.
- Are all the hoses in the right position?
- Mask ok?
- Fins ok?
- Computer ok?
- Other instruments (torch, compass…) ok?
And you? Do you have your magic formula for the buddy check?
Subscribe to:
Posts (Atom)
DCS RISK FACTORS AND LIFESTYLE
In one of the first articles on my blog we discussed about smoking and its consequences on scuba diving ( https://scubadivinggoodpractices.b...
-
As a consequence of Henry’s Law, while diving our body starts to accumulate nitrogen in the tissues due to the higher environmental press...
-
How many times did it happen that, arriving to the diving site, you find out that your BCD’s tank cam band is open and unconnected? Did ...
-
Many of us, reading our Open Water Diver manuals (including PADI and CMAS) have been instructed and warned about the danger of diving s.c. r...